Light is all around us, but how often do we stop to consider how it interacts with the materials in our environment? Teaching students about transparent, translucent, and opaque materials is a fundamental step in helping them understand light and its properties. With the Sort Transparent, Translucent, and Opaque Worksheets, you can bring this topic to life in a way that’s fun, interactive, and easy to understand.
What Are Transparent, Translucent, and Opaque Materials?
Understanding these terms is key to exploring how light behaves:
- Transparent Materials:
These are materials that allow light to pass through completely. Objects on the other side are visible without distortion. Examples include clear glass, clean water, and plastic wrap.
Fun Fact: Transparent materials are often used in windows and eyeglasses because they provide a clear view.
- Translucent Materials:
These allow some light to pass through, but the light is scattered, making objects on the other side appear blurry or indistinct. Examples include frosted glass, wax paper, and some fabrics.
Did You Know? Translucent materials are frequently used in bathroom windows to maintain privacy while letting light in.
- Opaque Materials:
These block light entirely, preventing it from passing through. As a result, opaque objects cast shadows. Examples include wood, metal, and stone.
Think About This: Opaque materials are used to create privacy and block light, such as curtains or walls.
Why Is This Topic Important for Young Learners?
Teaching about transparent, translucent, and opaque materials helps children develop an understanding of:
- Light and Shadows: Why some objects cast clear shadows while others don’t.
- Everyday Applications: How materials are chosen for specific purposes, like why sunglasses are tinted.
- Scientific Observation: Encouraging curiosity about how the world works and fostering critical thinking skills.
How to Teach Light Properties
Here’s how to make this topic engaging and memorable for students:
- Start with Exploration:
Set up a discovery station with a flashlight and various materials (e.g., plastic wrap, wax paper, a book). Let students observe how light behaves with each material and describe their findings.
2. Explain the Science:
Use age-appropriate language to explain that light behaves differently depending on the material’s structure. Transparent materials let light through directly, translucent materials scatter it, and opaque materials block it.
3. Connect to Real Life:
Ask questions like, “Why do we use glass for car windows?” or “Why do we need curtains for privacy?” These connections make the lesson meaningful.
4. Hands-On Activities:
The Sort Transparent, Translucent, and Opaque Worksheets provide an excellent opportunity for students to reinforce their learning through a cut-and-paste activity. They categorize materials based on light properties, which solidifies their understanding.
5. Extend the Lesson:
Encourage students to explore their surroundings and identify objects that are transparent, translucent, or opaque. They can create a mini poster with examples they find at home.
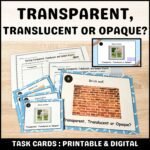
Incorporate task cards on transparent, translucent, and opaque materials into your lessons. There are a variety of ways to use them, such as in a scoot activity, at a center, in pairs, or even as an independent task.
Using the Resource in Your Classroom
This resource is designed to be both educational and fun. Here’s how you can use it effectively:
- Science Centers: Include it as part of a hands-on station where students experiment with real materials and then complete the worksheets.
- Guided Lesson: Use the worksheets to review the topic after a lesson on light properties.
- Homework Assignment: Send it home as a reinforcement activity that students can do with their families.
A Teaching Tool You’ll Love
The Sort Transparent, Translucent, and Opaque Worksheets is more than just a worksheet—it’s a stepping stone to deeper understanding. By integrating it into your lesson plans, you’ll foster scientific curiosity while meeting learning objectives.
Ready to light up your science lessons? Grab the resource here and inspire your students to see the world in a whole new way.